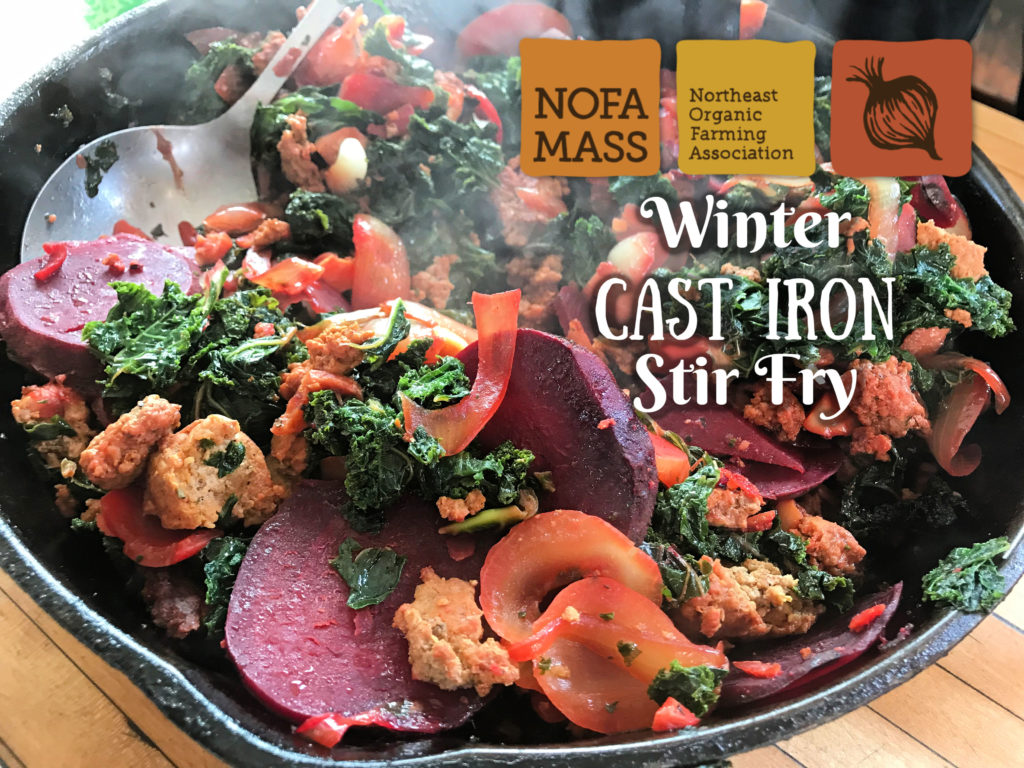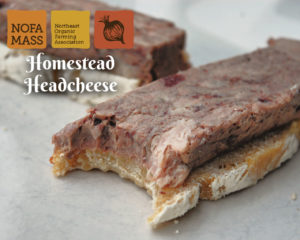
Jack’s Homestead Headcheese
F.O.O.D. Focus on the Organic Difference
vol. 7 11/30/18
By Christy Bassett for The Organic Food Guide and NOFA/Mass
This past weekend we processed our four pasture-raised heritage breed hogs. It is always a sobering experience to take a life- especially one that you have interacted with and nurtured daily for months.
But besides the mental hurdles that a homesteader who raises their own livestock for food must overcome, the butchering and preservation of the animal is a physically exhausting one. These pigs weighed in at varying sizes, but with an average hanging weight of over 100 lbs per half, it took four of us two full days to portion out all of the meat, bone, fat and organs. And then there is the processing of fat into lard, the bones into stock and, of course, the head into headcheese.
“Of course?”, you ask? Well, yes, of course. Because we wouldn’t want any of that organically and humanely raised animal to go to waste. Plus, it is relatively low impact to make and highly nutritious to eat. Headcheese is made from the head of a pig. After cooking the head overnight, the meat, fat and gelatin can be easily removed and formed into a loaf which slices beautifully the next day. Just like cheese.
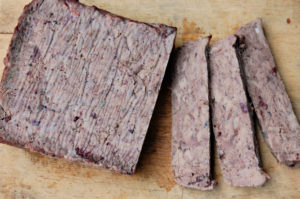
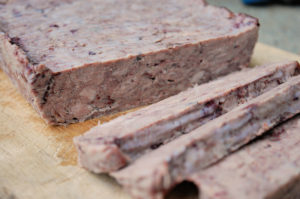
Slice evenly with a sharp knife for best results
This year, I tried a recipe from Jack Kittredge’s archives. You may remember from a previous article on The Organic Food Guide that Jack is the co-farmer at Many Hands Organic Farm in Barre, MA as well as the editor of The Natural Farmer and the previous man behind the helm at NOFA/Mass’s Organic Food Guide. If anyone knows how to utilize all edible parts of something homegrown, plus make it palatable, it’s him. I served mine on homemade Einkorn sourdough. (Anybody want that recipe too? Let me know and it may be featured in a future edition of Focus on the Organic Difference.)
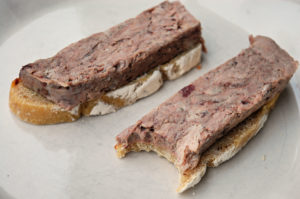
Headcheese on Einkorn sourdough bread
Ingredients
1 Pig’s head
1 Tbs vinegar
Sea salt
Black pepper
3-4 gallons water
Supplies
waxed paper
2 bread pans
1 brick
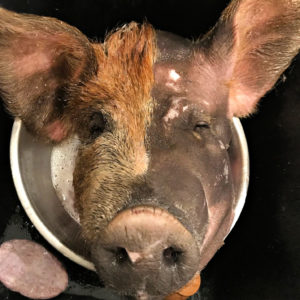
I brought our pig’s head inside to shave it in the kitchen sink. Here she is, half polished.
“I’m not sure how many NOFA/News readers remember the original SPAM, a brand named canned pork loaf. It was pretty ubiquitous in the 1950s and was, I guess, one more of those new exciting products science and technology were going to bring us, lucky us. You could cut a slice of it off like sandwich meat, fry up a chunk like a burger, or eat it right out of the can without formalities if you were homeless or otherwise temporarily without benefit of a kitchen. I’m sure it’s still around, although it has been given a bad name by more recent information technology.
SPAM, as far as I can tell, is simply the industrial version of an old folk food, headcheese.
Although we have raised organic pigs for a number of years, this is the first fall I made headcheese. Julie and I had just done a practical skills workshop on preserving food and I was feeling self-confident and like we should press the envelope. I’m glad I did. Headcheese is a simple, delicious, practical and flexible food. If you raise pigs or buy one from a farmer each fall, it should also be virtually free.
I had to remove the ears to get our pig’s head to fit into our 4 gallon stock pot.
Directions
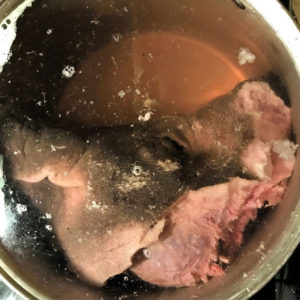
1) Boil the pig’s head in water and vinegar (to leach out calcium from the bones) for at least 12 hours.
(This may be the hardest part for some. We use a 5 gallon pot on our wood stove, and our pigs’ heads are sawn in half right between the eyes. Even so, the 2 halves barely fit in the pot.)
2) Separate out the meat.
(This will be the other hard part. There is a surprising amount of meat in a head — tongue, cheek muscles, eye muscles, etc. After boiling for 12 hours the bones come out clean but muscle, fat and skin are all mixed together. Once the mix cools to manageable temperatures, pick up a paring knife, roll up your sleeves and go to work. If you think about it, you can actually find many interesting things to muse upon and discuss with your children. The tongue, for instance, had a tough but easily stripped off membrane like a chicken’s gizzard which allows this essential muscle to encounter all sorts of hazards without damage to its own soft tissues. The eyeballs are connected by tendons to small muscles that allow them to work together to focus. I guarantee that if you discuss and show these things to your children [and if they are under the age of adolescence] they will not feign disgust but be really interested and oh so glad you are finally talking to them about nature, as it is!)
3) Finely chop the meat
(No special message here, except don’t be too careful to eliminate all the fat from the meat. Many headcheese tissues are complex combinations of muscle, integument and fat. A certain amount of fat is necessary as a binding agent in the loaf, so err on its side. My first loaf was picked clean for meat and wouldn’t hold together when cut into slices.)
4) Salt and pepper to taste
(Remember, you may be eating this in a sandwich without opportunity to season to your taste. So do it now, before forming the loaf.)
5) Form the loaf
(Line a bread pan with waxed paper and spoon the fatty chopped meat into the pan. Compress the mix with the back of the spoon and when it is all there fold the waxed paper liner over the top of the pan.)
6) Compress the loaf
(Set the 2nd bread pan on top of the first and put a brick in it. Set the stack in the refrigerator and let it congeal. After a day of compression, it can be frozen for later or used while fresh.)
Congratulations! You have just taken what would be considered a waste product in many parts of our culture and gotten real value out of it. Plus, you have given the rest of the head (bones, fat, skin) to your dogs – or your neighbors dogs – who need to put on weight in the fall if, like ours, they are required to stay outside all winter and guard the livestock. I can assert that Jimbo is quite used to this natural seasonal change and seems to enjoy it and not even question his responsibilities under the deal.”
Store refrigerated, or freeze slices individually.